> For the complete documentation index, see [llms.txt](https://docs.powermonitor.com.br/llms.txt). Markdown versions of documentation pages are available by appending `.md` to page URLs; this page is available as [Markdown](https://docs.powermonitor.com.br/en/readme/como-instalar-o-power-monitor/configuracao-de-permissoes-no-azure-para-o-power-monitor.md).
# Configuring Azure permissions for Power Monitor
Azure permissions required for Power Monitor to pause, resume and change the size (SKU) capacities and read their cost, automatically or manually.
The **Capacity Governance** features (scheduling **Pause** and **Resume**, **scaling the SKU** up and down, **Autoscale** and manual scaling) and the **Capacity Cost** feature act directly on the capacity resource in Azure. For this, the Power Monitor application (Service Principal) in your tenant needs permissions in **Azure**, which are **not** granted by the standard installation.
{% hint style="info" %}
These actions apply to capacities that are **Azure resources**: **Microsoft Fabric (F-SKU)** and **Power BI Embedded (A-SKU)** capacities. Power BI Premium per capacity (P-SKU) and EM capacities cannot be paused or resized through Azure.
{% endhint %}
The application appears in your tenant as **PowerMonitor-APP** (automatic installation) or with the name you gave the App Registration (manual installation).
## Which permissions are required
| For | Permission | Where |
| ------------------------------------------------------------- | -------------------------- | ------------------------------------------------------------------ |
| Pausing, resuming and changing the size (SKU) of the capacity | **Contributor** | On the capacity resource (or on the resource group / subscription) |
| Pausing, resuming and changing the size (SKU) of the capacity | **Capacity administrator** | In the capacity settings |
| Automatically discovering the location of capacities in Azure | **Reader** | On the subscription |
| Reading the cost of each capacity | **Cost Management Reader** | On the subscription |
***
## Option 1: Grant through Power Monitor (recommended)
A Power Monitor administrator can grant everything through the platform itself, using **their own Azure account**. Prerequisite: the account must be **Owner** on the capacities' subscriptions or have an equivalent combination of roles (**Contributor** with **User Access Administrator** or **RBAC Administrator**).
### How to enable pause, resume and size change (SKU) through Power Monitor
{% stepper %}
{% step %}
### Open the permissions
In Power Monitor, go to *Settings › Additional Permissions* and find the **Azure permissions** group. (During the automatic installation, the same card appears in the **Additional Permissions** step.)
{% endstep %}
{% step %}
### Grant on the Capacities (Governance) card
Click **Grant permissions**. Power Monitor syncs the capacities, adds the Service Principal as **Administrator** and **Contributor** of each one and, if it finds capacities whose Azure location has not been resolved, asks for confirmation to grant the **Reader** role on the subscriptions. Confirm the windows that are displayed. (In the installation wizard, Reader is requested with the **Request permission** button.)
{% endstep %}
{% step %}
### Check the result
The card shows the result of each step and, per capacity, the **Azure location**, **Capacity admin** and **Pause and resume** marks. If it indicates that some capacities were left out, click **Grant permissions** again.
{% endstep %}
{% endstepper %}
### How to enable cost reading through Power Monitor
1. In *Settings › Additional Permissions*, on the **Capacity Cost** card, check the list of subscriptions.
2. Click **Grant permissions**. The **Cost Management Reader** role is assigned to the Service Principal on all listed subscriptions.
3. The card shows **Awaiting propagation** and checks itself until access is confirmed.
Details of each card in [Additional Permissions](/en/power-monitor/configuracoes/permissoes-adicionais.md#how-to-use).
{% hint style="warning" %}
If Azure rejects the assignment, confirm that the Owner role is active **exactly on the capacity's subscription** (and, if you use PIM, that the activation is still valid). After granting Reader, Azure may take a few minutes to propagate the access; wait and repeat the grant.
{% endhint %}
***
## Option 2: Grant manually in the Azure portal
### How to assign the Contributor role
In the Azure portal, search for the **capacity** and open the resource.
In the side menu, go to **Access control (IAM) › Add › Add role assignment**.
On the **Add role assignment** page:
* On the **Role** tab, under **Privileged administrator roles**, select **Contributor**;
* Open the **Members** tab.
Click **Select members**, search for the Power Monitor application and select it.
Click **Review + assign** to finish.
### How to add the application as a Capacity administrator
Still on the capacity page, go to **Settings › Capacity administrators**, click **Add**, search for the Power Monitor application, click **Select** and then **Save**.
### How to assign Reader and Cost Management Reader on the subscription (optional)
Repeat the role assignment in **Subscriptions › (your subscription) › Access control (IAM)**, choosing **Reader** (for automatic discovery of the capacities' location) and **Cost Management Reader** (for the capacities' cost).
***
## How to provide the resource location (when access is only on the resource)
If the application has permission **only on the resource or the resource group** (and not Reader on the subscription), Power Monitor cannot discover on its own where the capacity is. In this case, provide the location:
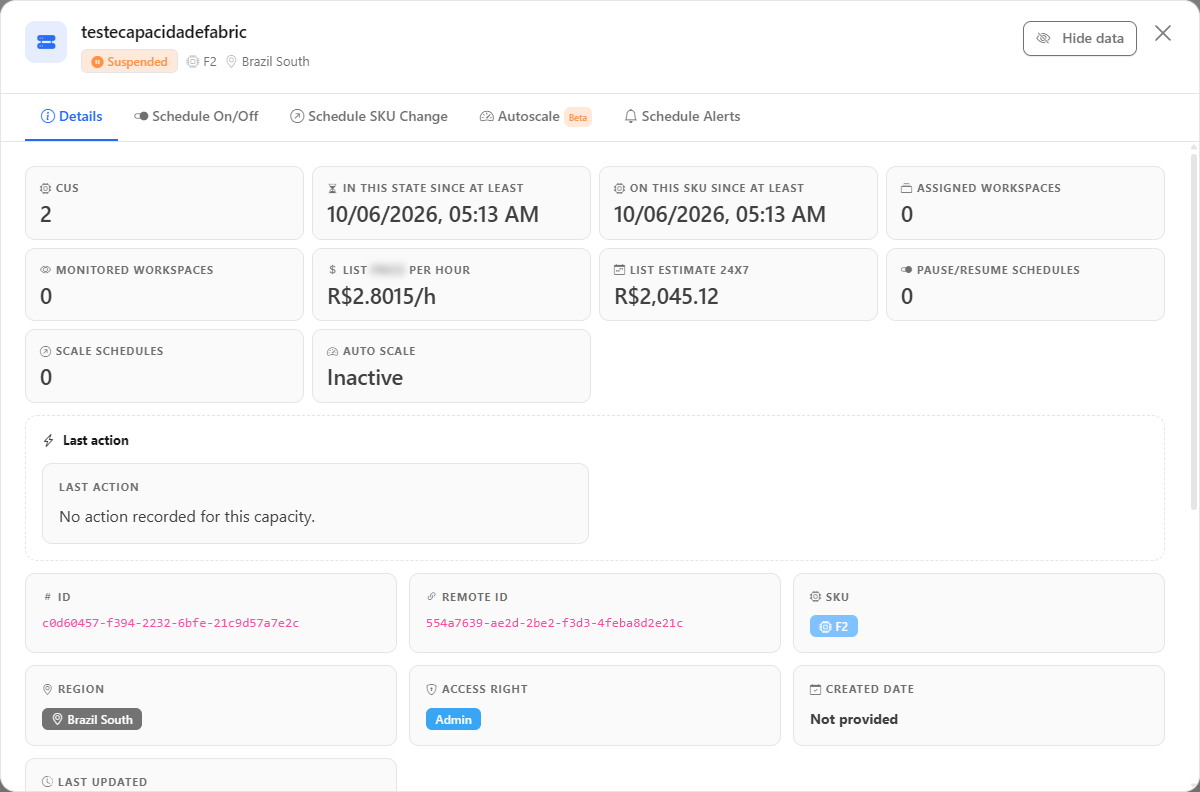
1. Go to **Governance › Infrastructure › Capacities** ([open in Power Monitor](https://app.powermonitor.com.br/governance/capacity)) and open the capacity's **Details**.
2. Under **Azure Resource Location**, enter the **Subscription ID**, the **Resource Group Name** and the **Resource Provider** (for example, *Microsoft Fabric capacity*).
3. Click **Save**.
The subscription ID and the resource group name appear on the capacity's **Overview** page in the Azure portal.
Azure resource location, in the capacity details
***
## Next step
With the permissions granted, administrators can configure the following on the capacity, in **Governance › Infrastructure › Capacities**:
* **Schedule On/Off** (pause and resume on defined days and times);
* **Schedule SKU Change** (change the SKU on defined days and times);
* **Autoscale** (scale according to consumption) and the **Change size (SKU)** action, for an immediate manual SKU change;
* **Schedule Alerts** (notice when the capacity is running outside the expected hours).
All executions are recorded in **Audit › Capacity Actions**. See [Capacity Governance](/en/principais-funcionalidades/governanca-de-capacidade.md).
---
# Agent Instructions
This documentation is published with GitBook. GitBook is the documentation platform designed so that both humans and AI agents can read, navigate, and reason over technical content effectively. Learn more at gitbook.com.
## Querying This Documentation
If you need additional information that is not directly available in this page, you can query the documentation by asking a question.
Perform an HTTP GET request on the following URL with the `ask` and `goal` query parameters:
```
GET https://docs.powermonitor.com.br/en/readme/como-instalar-o-power-monitor/configuracao-de-permissoes-no-azure-para-o-power-monitor.md?ask=&goal=
```
`ask` is the immediate question: it should be specific, self-contained, and written in natural language.
`goal` is what the user is ultimately trying to achieve, the reason they need the answer. Sharing it helps GitBook give you a better, more relevant answer. A goal is most helpful when it describes the outcome the user wants rather than restating the question. For example, with `ask=how do I create an API token`, a goal like `automate deployments from our CI pipeline` lets GitBook tailor the answer to that use case.
The response will contain a direct answer to the question and relevant excerpts and sources from the documentation.
Use this mechanism when the answer is not explicitly present in the current page, you need clarification or additional context, or you want to retrieve related documentation sections.
.png?alt=media)
.png?alt=media)
.png?alt=media)
.png?alt=media)
.png?alt=media)
.png?alt=media)